Step 1. Open PDF File
After installing PDFelement, double-tap its icon to launch it. On the main interface, click the “Open file” icon to access the file explorer window. On this window, select the PDF file that you want to protect and hit the “Open” button. Wait for the PDFelement to finish uploading the PDF file to the interface.

Step 2. Set Password on PDF
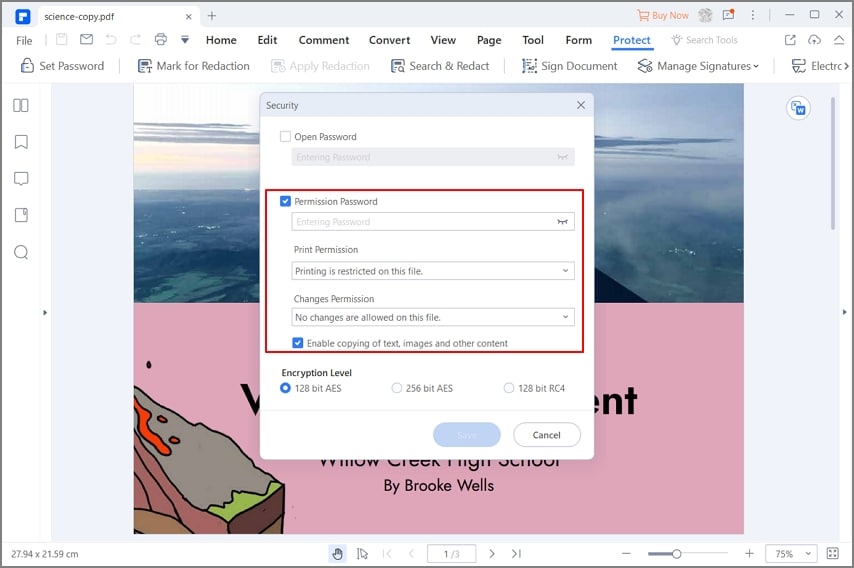
When the PDF file is uploaded, go to the toolbar and select the “Protect” tab. from the sub-menu, click the “Set Password” option and ignore the rest. Upon hitting this option, the program will immediately display the “Security” dialogue box. You should see the “Open Password” and “Permission Password” checkboxes.
To set the open password for PDF, simply check the “Open Password” checkbox. The “Open Password” field should immediately become active. Enter a suitable password in this field. This password will be demanded by the PDF file every time you try to open it.

Permission password is the password that the PDF file will demand if you want to make some changes or print the document for instance. To set the permission password, check the “Permission Password” checkbox to activate the “Password Permission”, “Print Permission” and “Changes Permission” fields. Enter your desired permission password and select the target print and changes permissions. When you are done with your selections, click “Save” to allow the program to apply the password to your PDF file.

Step 3. Save PDF with Password
Finally, go to the “File” menu and select the “Save” option to save the changes you made.


