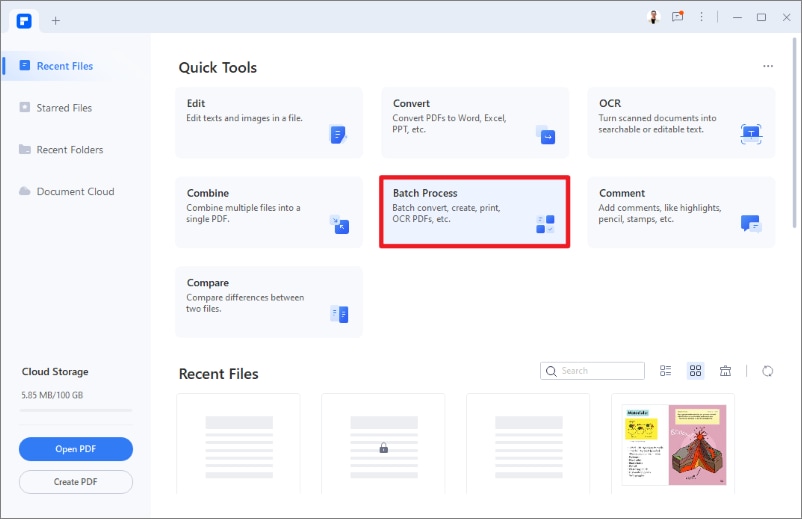
Step 1 Click the “Batch Process” Feature
Assuming that you have already downloaded and installed the tool on your desktop, launch PDFelement and locate the “Batch Process” feature on the homepage. Click on it and move further.
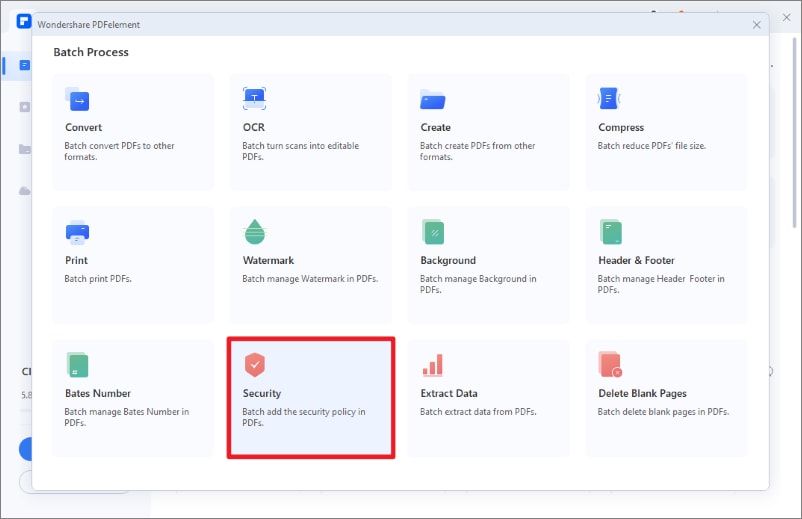
Step 2 Start the process
A pop-up window will appear on the screen, indicating functions for which batch functionality is available. Scroll down and click the “Security” tab.
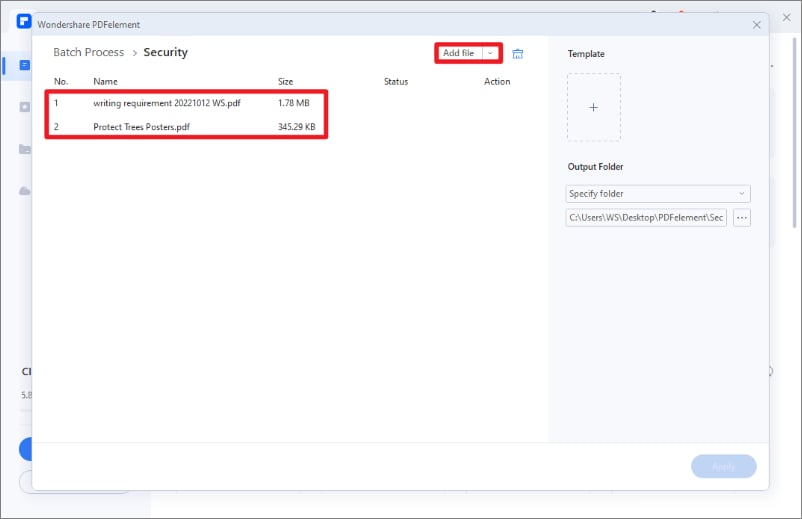
It’s time to import the PDF files you wish to protect. Select multiple files from the file browser window and upload them to the interface. Alternatively, you can click the “Add File” button on the top to import files one by one. Do not forget to select the output folder where you wish to save the password-protected files.
Once you are done importing PDFs, it’s time to set a password to complete the process. You can set either Open Password alone or both Open and Permission Password to enhance the security of the file. Remember that setting an Open password is mandatory, while the Permission Password is optional. Set a strong password, pick the encryption level, and name the output template. Wait for a few seconds until the tool encrypts your files.
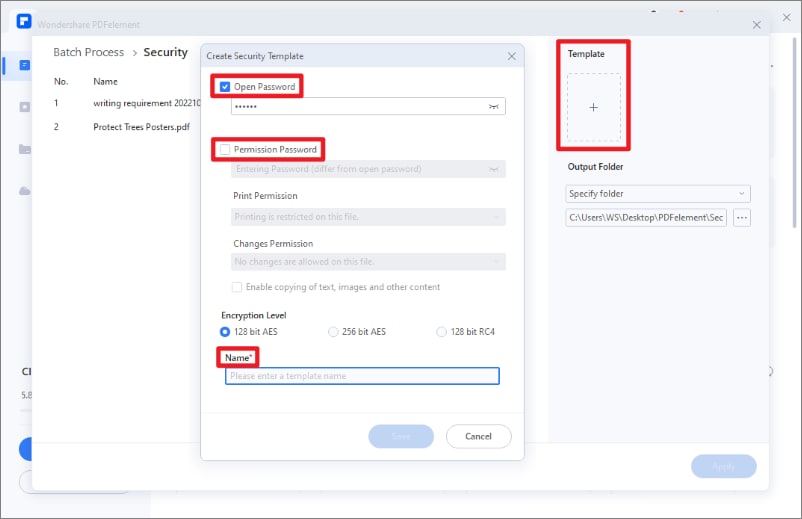
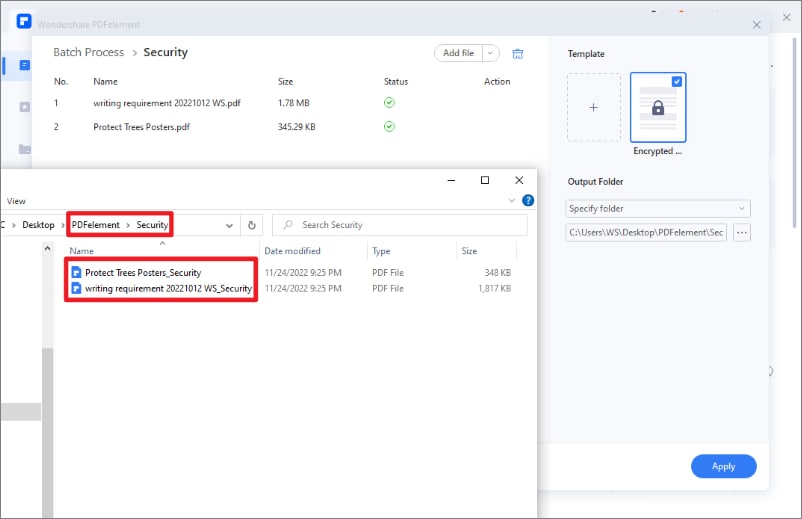
As soon as it’s done, click the “Apply” button in the bottom right corner of the page to save the encrypted file.
Exit the application and go to the specific output folder which you have chosen while encrypting the file to access the encrypted PDF version.
